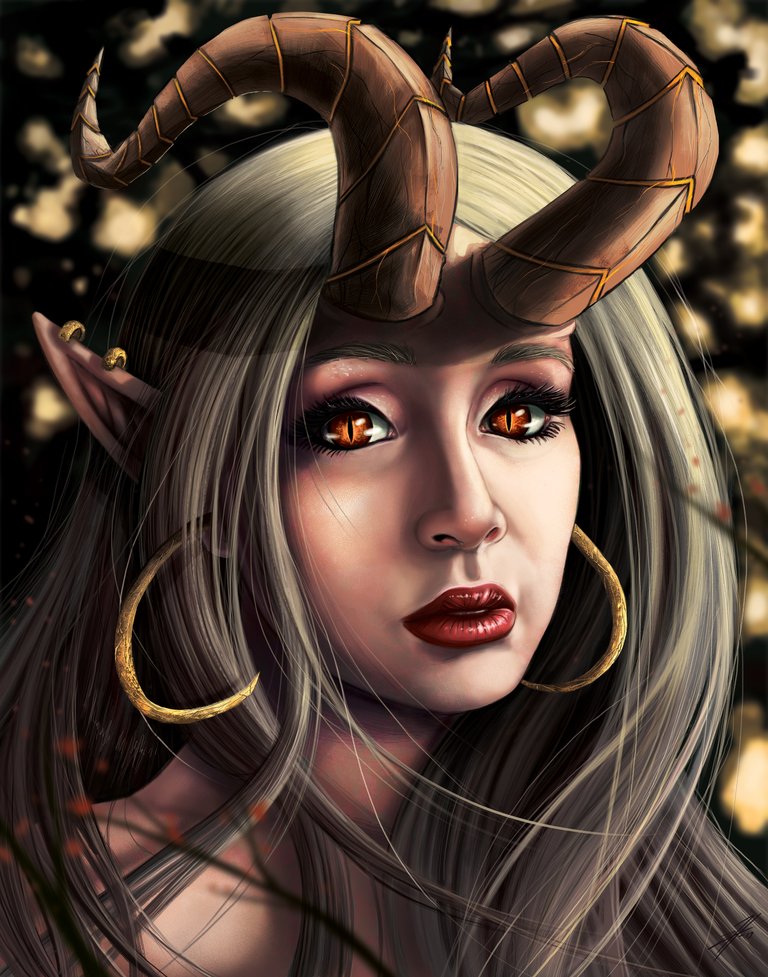
Hello again my fellow steemians!!! I AM BACK just as I promised, its only been a few days but Im back to share with you another art post! I just finished this for a client and she was soooooo happy!! Apparently she and her boyfriend have been a long time fan of my art, so of course I went ahead and made her an amazing portrait for her collection. I also had it printed and shipped!! *ill make a separate post about her receiving her canvas * Ok here it is!! and ill go through my steps per usual ^_^
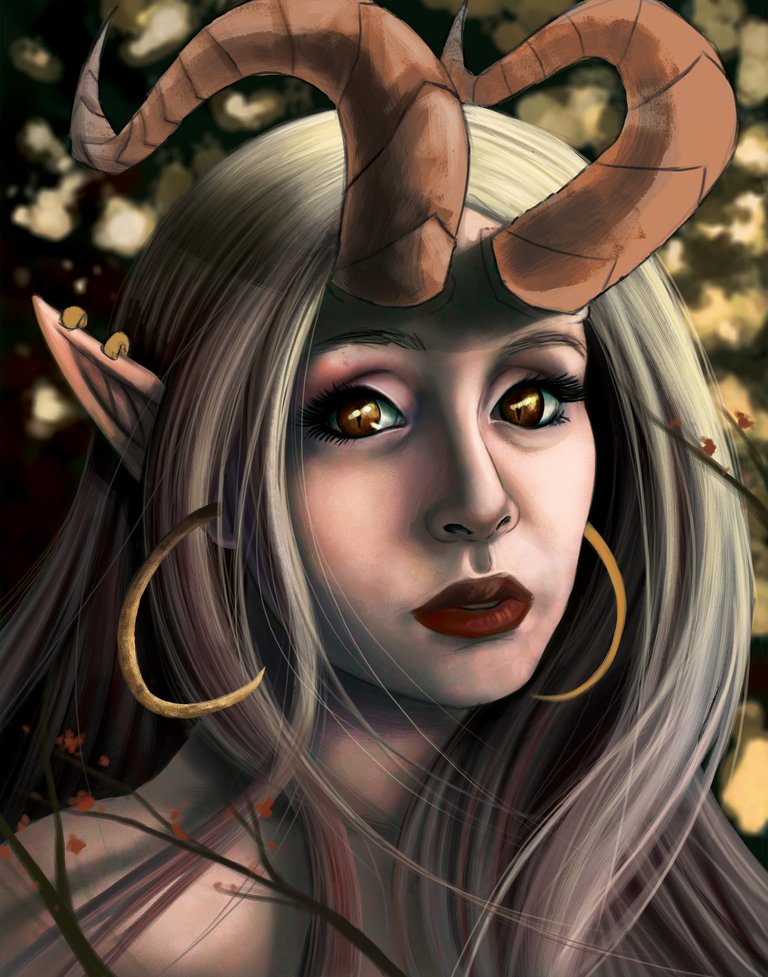
Here is the finished project!!
References.
She came to me and wanted something done... but also wanted me to have free range with whatever I was going to create for her! So she left me with these two pictures are ref.
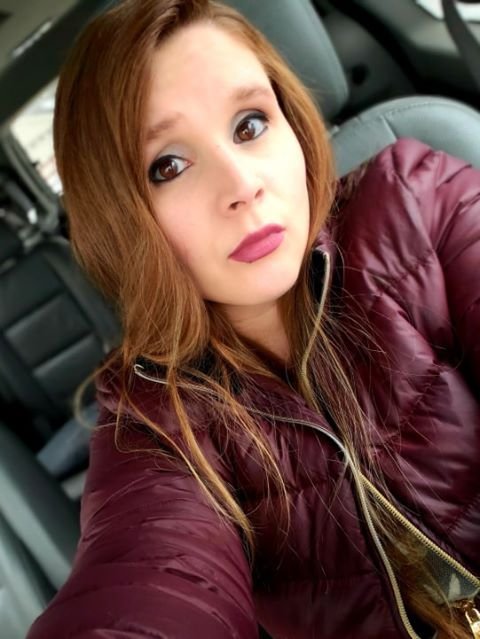
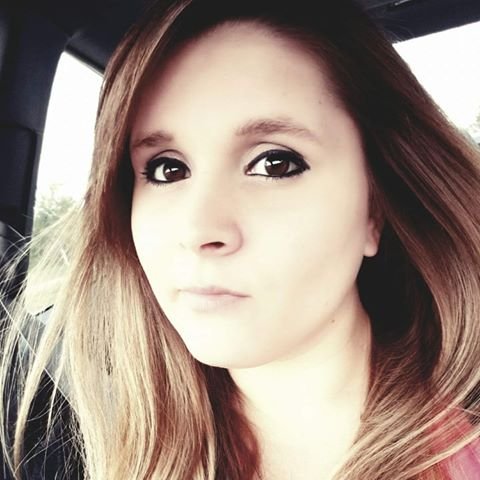
she loved her face in the first one, but lovveeddd her hair in the second!! So I kinda wanted to take inspiration from both!!
BEGIN!!!
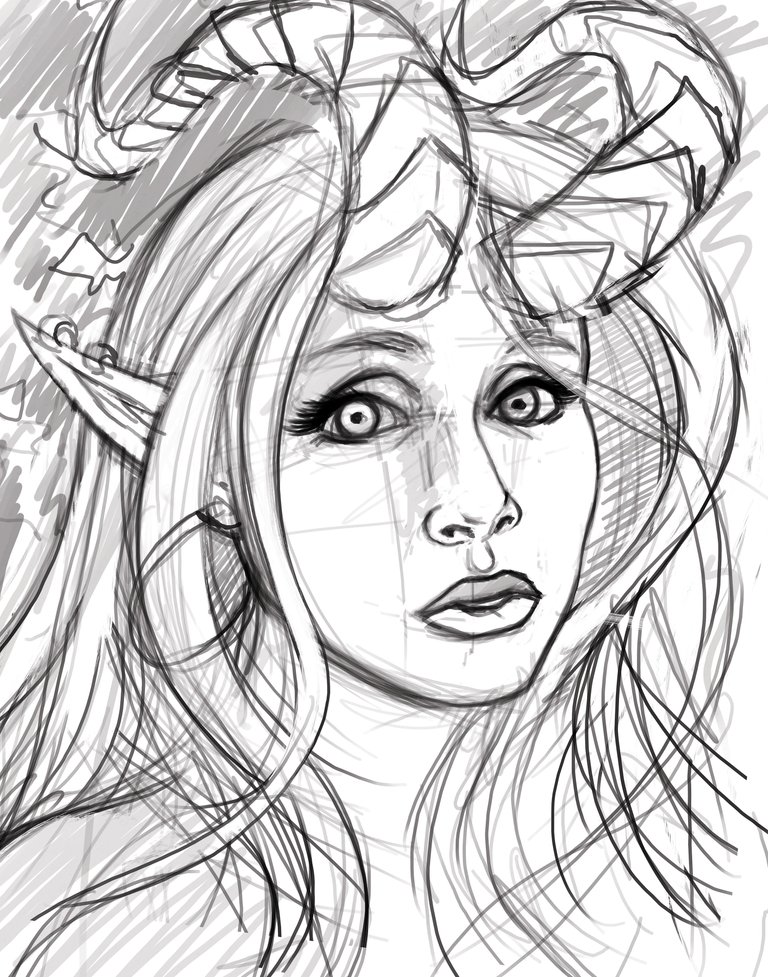
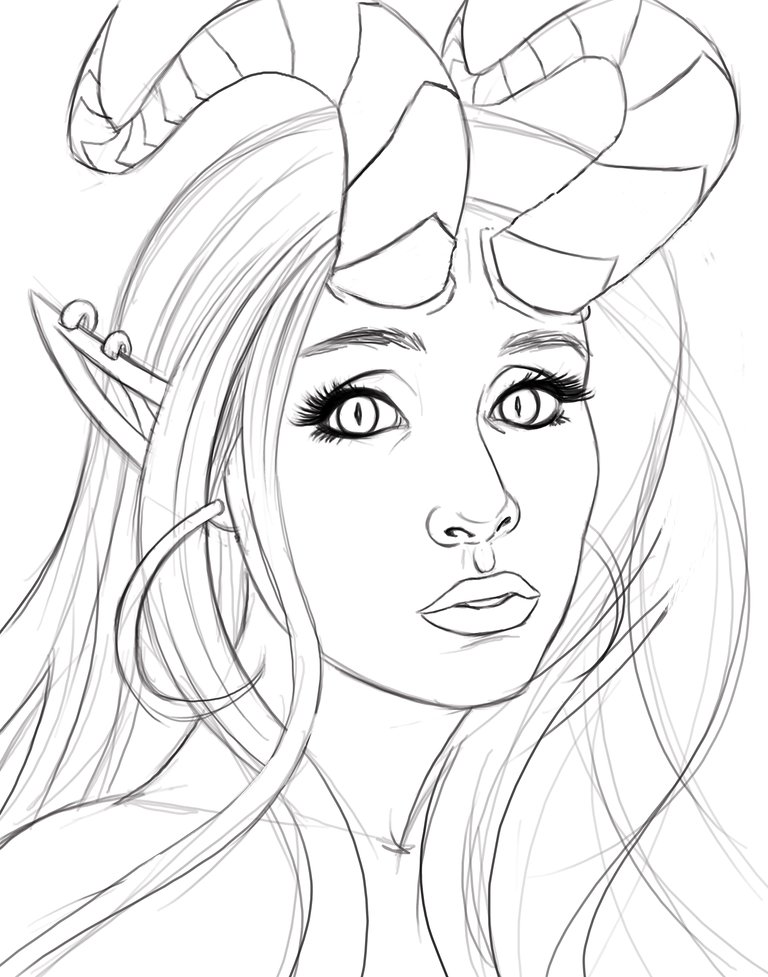
Step 1- Sketch phase.
This is always one of the funnest phases in any art piece, its fresh its new... you can flow and work through your thoughts and creativity. Always a pleasure to just sketch freely.
Step 2- LINEEESSS
Once I have my completed sketch I pick my lines that are my favorite per-say.... I need a clean foundation in order to begin painting!!! well... clean enough haha, sometimes I make SUPER clean lines, sometimes I leave room for me to have some freedom with my painting process. Im random sometimes... xD
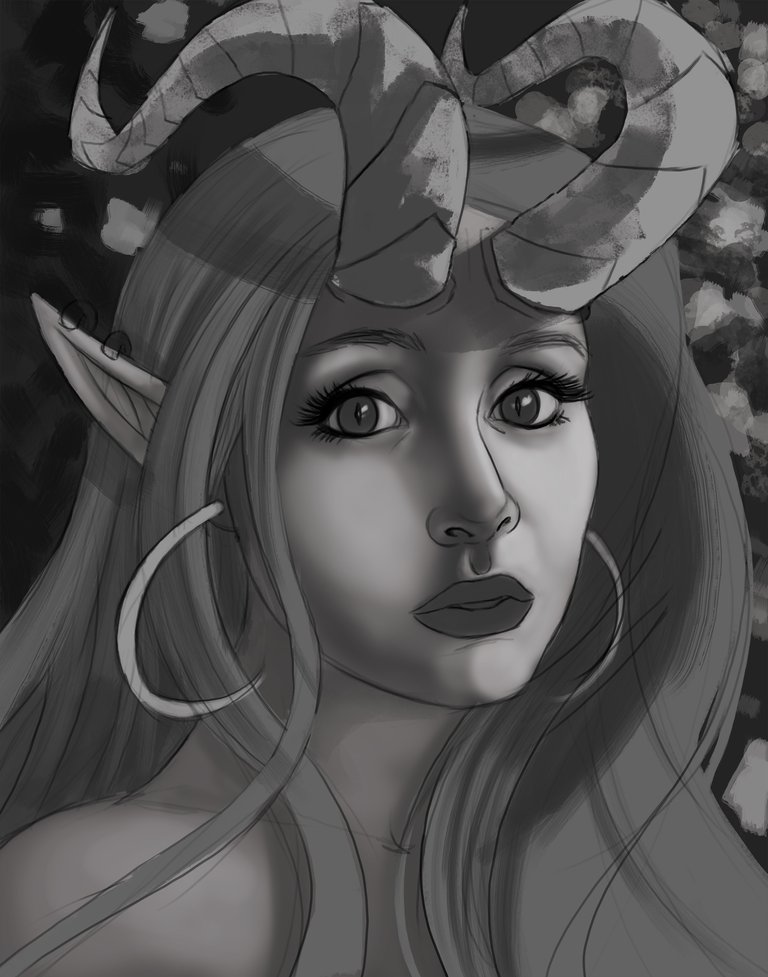
Step 3- Greyscale!
NOW this is a step I dont usually take... usually im BAM strait to color, But there is always more than one way to skin a cat, * wow what a terrible old analogy * hahah... ANYWAYS, yes I decided I wanted to play around with some gradients before going strait to color. here they are!! ^_^
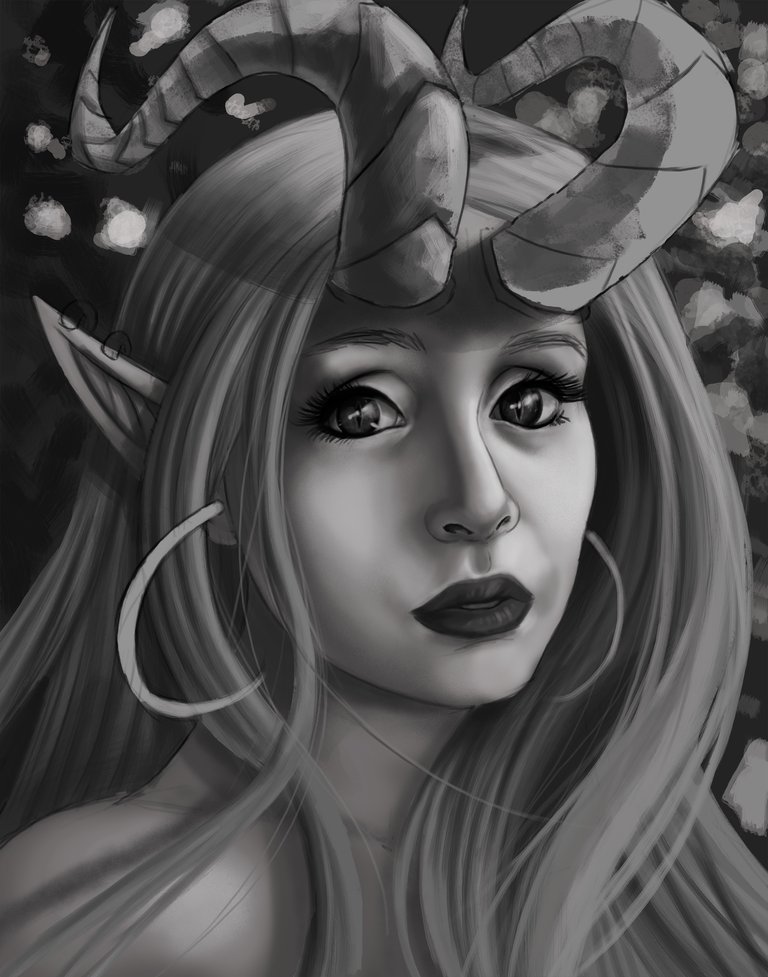
Step 4 - COLORRR
Now the correct way to do the greyscale thing is to FULLY paint it out before you jump to color.. but I unfortunately am quite impatient at times hahah. BUT thats ok! I always get to where I need to go when it comes to art. I was done staring at a black and white picture when I could feel color oozing out of my soul.
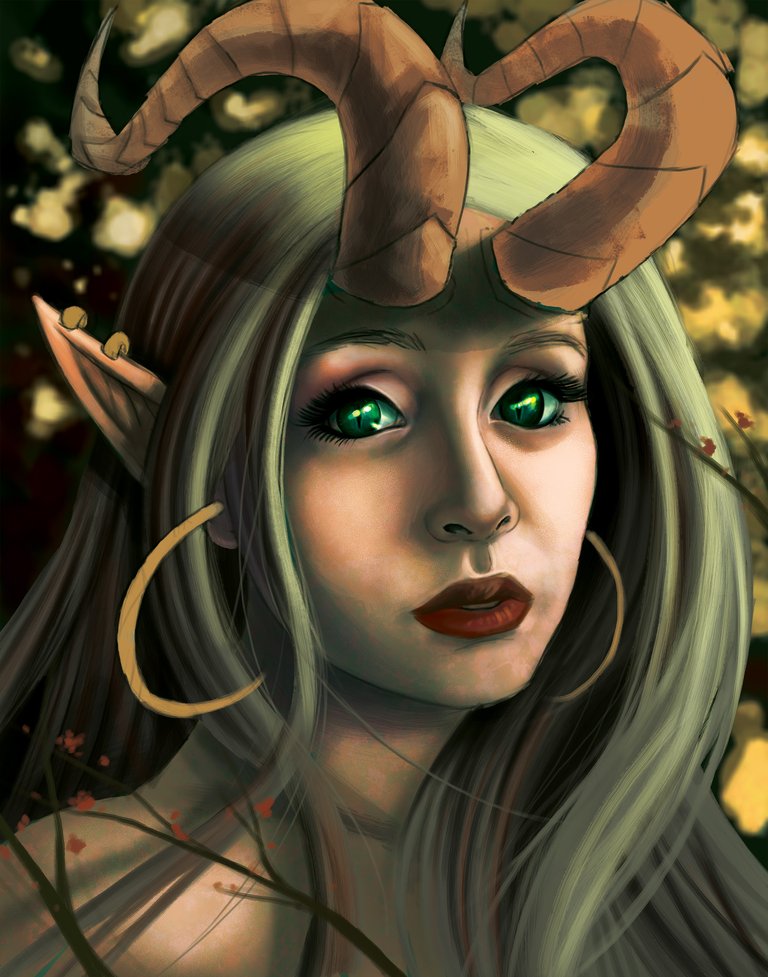
I work in photoshop so its simply creating new layers color layers and overlaying them... there are also color brushes, and color gradients.. so many ways to do this. BUT LOOK, finally some color. I wanted it to have a very warm and foresty feel...
Step 5- More color!!
I decided that it was much too yellow, it looked really cool at first but my eyes are constantly changing when it comes to stuff I either like or dont. You can see that I have begun adding more details as well as figuring out the skin tone.
Step 6. Time to start painting details!
Here you can see, especially in the eyes how I have begun painting in details, little strands of hair... fixing colors and lights.. this is the meat and potatoes of this process.
Step 7. the slow end process...
It doesnt look like much of a difference but SOOO much has happened!! AND I actually received a tip from a dear friend of mine involving a bevel tool... ill show that next. I really wanted some nice texture in those earrings !!
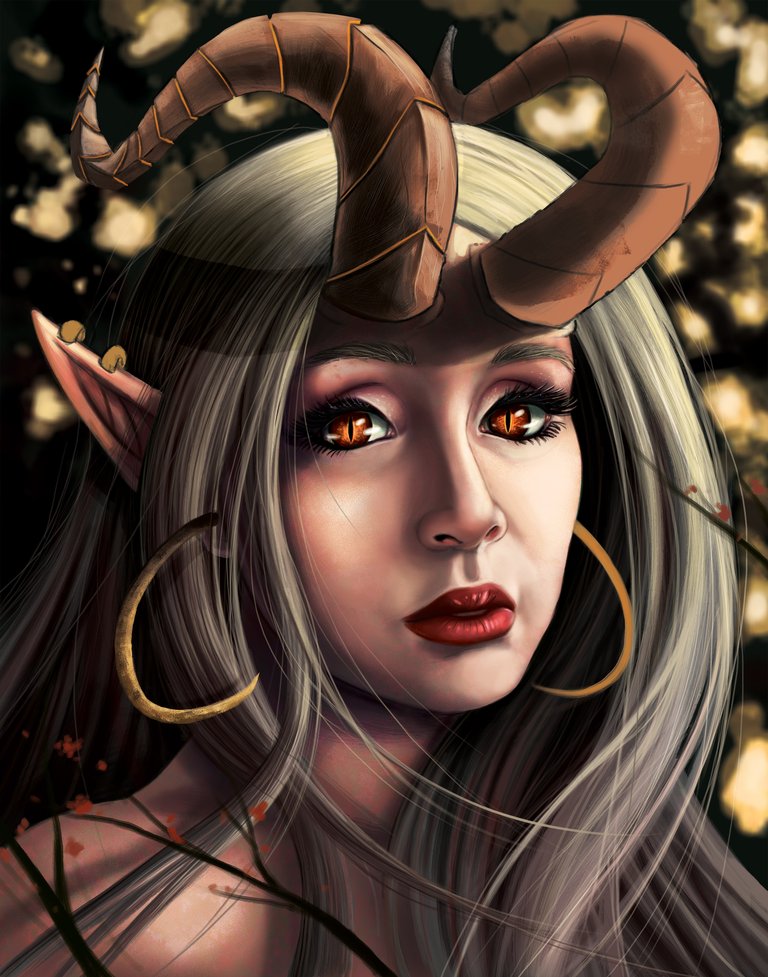
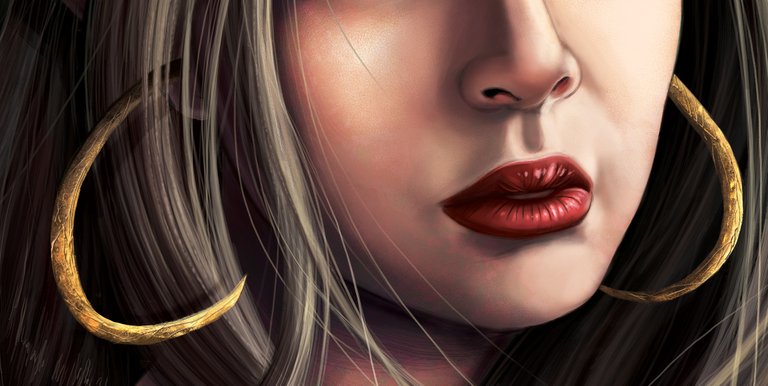
Step 8. THEM TEXTURES!!
Here is a close up of the rings after I added my texture... it looks very nice I think :)
COMPLETTTEEE!!! I think over all this piece probably took me about 7-10 hours. I didn't record my process this time but that's ok, I don't always feel like doing so :).
I REALLY HOPE YOU ALL ENJOYED THIS!!
I will be back again and again with much more art to come!!
Again my name is Nycto and thank you so much for stopping by, you love comments and support is what keeps me going ^_^. -Nycto
